CHUCKS AND MORE CHUCKS
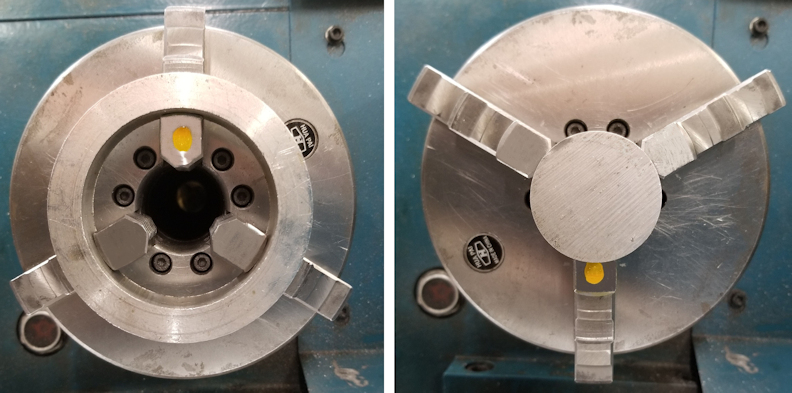
A few rookie tips that a few old timers may have forgotten: The risk of a drill bit slipping in a Jacobs chuck, gouging the drill shank, can be significantly reduced by tightening all 3 “holes” in the chuck with the chuck key. When clamping the O.D. of a part in a 3-jaw lathe chuck, place a jaw in the 6:00 position (jaw with yellow dot in picture). Rest or hold the part against this jaw as you tighten the chuck. This will improve the centering and alignment of the part. When clamping the I.D. of a part, place a jaw in the 12:00 position; rest or hold the part against this jaw as you tighten the chuck. This will improve the centering and alignment of the part. With most 3-jaw lathe chucks, tightening one of the chuck-key pinions usually centers the part better than the remaining two pinions. Mark this pinion with a punch (circled with black paint, upper left in the picture.) To determine which pinion centers best, number the pinions and clamp a precision round workpiece in the chuck. Tighten the chuck using only the 1st pinion and test the pin’s run-out with an indicator. Repeat the process for the other two pinions. Punch-mark the pinion that causes the pin to have the least amount of run-out. In use, begin by lightly clamping the part using the marked pinion first. Next snug the other two pinions; then finish tightening the chuck using the marked pinion again.
Tom Nichols
Automotive Machine & Supply, Inc
Joshua, TX
JAN, 2022